
Home/Mechanics
How the game actually works
Combat, stats, elements, rotations and death. The systems layer, with the Refuge's changes marked where they land.
Combat was rebuilt, not tuned
Skills matter more than gear checks. You dodge, you rotate, you move.


Combat Reworked, as the original server documented it
This is the original server's own wiki, kept because it is the only surviving description of that world. The Refuge has changed a great deal of it. Where this site knows about a change it is stated above, or corrected in the text below; anything else here describes the game as it was, not as it is.
In Return to Morroc, facing monsters head-on and expecting to outstat them is a BIG problem. Monsters now have different interactions and behavior and they will cause problems if you just try to ignore them.
As a side note, this acts as a basic anti-bot system...because you WILL need to move out and react.
Using Heal Lv3+ is expected from all players. Not relying on potions and items to heal. For this reason it's strongly recommended to always have a Heal Manual of any capacity in hand to improve Heal Lv available and to get basic INT for good SP Regen and Heal Power.'
It's recommended to check Stat Changes For more details on background changes.
If you approach the combat the same way you approach it on classic, you will struggle, a LOT.
Monster AI Changes
Monsters now deal very reduced auto attack damage. this is considered "Check" damage. if you can't survive this damage, it means you're not ready for this fight.
Monsters now cast skills very often.
Monsters may use skills in unexpected/forbidden ways.
All monsters can be killed with the approapriate gear. They might just need thinking about how to approach this situation.
- This doesn't apply to bosses.
- Some monsters may have their basic attacks as a mechanic itself, with quick or strong hits.
- Lower fields and low rank dungeons usually have long cast times, lower damage and more margin for error.
- Higher fields and higher rank dungeons usually have quick cast times, higher punishment for errors or straight up fail mechanics.
- A Monster might use Revelation/Ruwatch on you to block your use of hiding to dodge targeted skills.
- A Monster might use an AoE directly on you as a targeted skill instead of self to check your positioning and your party.
- A Monster might use offensive skills that you need to take advantage of to prepare for the next action, like it creating a Safety Wall and a few seconds later instantly cast a heavy hitting melee skill.
Monster Group Changes
- Regular monsters fight with direct skills and behavior. They are the common monsters found everywhere.
- Champion monsters are stronger than the other monsters of the same area and require attention to fight. They usually provide much higher EXP than usual.
- Mini-Bosses are strong monsters that usually have weaker variations of MVP's mechanics, they are a good practice method, when available, before taking on a MVP.
- MVP Bosses hit hard and have aggressive patterns, they may have specific punishment and counter skills to common tricks, They may have long casts for simple skills denoting it's not time to run, but to take advantage of it. Most MVPs don't resummon slaves, and some don't have any of them. They may also change behaviour when their HP get lower.
- Some monsters might always come in pairs or summon other unique monsters when a certain condition is met. This is very relevant for creating specific conditions, including Dracomancer's job quest.
Basic Combat Mechanics
It all depends on four factors.
1- The Enemy is a Boss. In this case, you can't directly hide from it's skills. You'll need to either survive targeted skills or find barriers/break sight line.
2- The Enemy is a Demon or Insect. In this case you can use the same strategy as bosses or wear equipment/cards that grant you perfect hiding.
3- The Enemy is anything else. Regular fightning mechanics apply.
4- The Enemy is using a special skill in an unexpected way (usually only in Rank S dungeons), the skill cannot be avoided and must be handled indirectly such as by failing a skill dodge on purpose, swapping gear or other ways.
Some Skill Types : Keep in mind some monsters are immune to Silence or Stun due to high status.
NOTE: It may be also a valid strategy to knockback monsters so their AoE around themselves don't hit you or your party.
- Targeted Cast: Just hide or break sight line. You can also silence or stun the target.
- Untargeted Cast: Usually means an AoE around self or specific skill. move away just in case.
- Small circle ground Cast: Usually means a directional skill, move out of that direction.
- Large circle ground Cast: A Large AoE on the shown Area.
- Red Squares around caster: A strong skill with unique properties. Move out.
Combat Mechanics, as the original server documented it
This is the original server's own wiki, kept because it is the only surviving description of that world. The Refuge has changed a great deal of it. Where this site knows about a change it is stated above, or corrected in the text below; anything else here describes the game as it was, not as it is.
Combat Mechanics
Combat in Return to Morroc is completely different from the original game. The main features available are:
See also: Regions and Dungeons
- Shadow System : Dying in a dungeon is always tense, dying brings a Shadow to life that will try to kill your party members...But can also resurrect you if they are brave and fight back!
- Skill based combat: SP Regen speed is drastically increased, SP is no longer a resource you exhaust and wait: it's something you control the constant use.
- Combo Skills: Some skills now have special interactions when used right after another different skill. This can be extra hits or increased damage.
- Skill Rotations: Skills no longer are spammed (with exceptions) and require rotating different cooldowns and skills in order to get maximum efficiency.
- Monster Mechanics: You are required to dodge the skills used by monsters, or take a heavy hit. Move away from cast area, hide from targeted hits, run behind cover, dynamic combat situations with monsters who might assist one another, trap you with a curved ice wall, lock you in place or punish heavy mobbing overall.
- Massively decreased numbers. Gone are the days of the barrage of 100k+ hits of the modern version. Gone are the cheap one shot mechanics of MVPs.
- Ranking System : Dungeons have difficulty tiers with differences based on what to expect, from E to S . Anything can be done solo with enough preparation and equipment.
- Small bonus experience for fighting monsters above your level. Harsh penalties for monsters under your level, moving on and seeking new challenges is always needed.
Stats and the cost curve
Points get more expensive as they climb, breakpoints survived from pre-renewal, and almost every skill now scales off a stat.

What each of the six actually does is one line each in the codex, along with Hit, Flee, Perfect Dodge and the rest of the vocabulary. What follows is the part that is specific to this world.
Character Stats, as the original server documented it
This is the original server's own wiki, kept because it is the only surviving description of that world. The Refuge has changed a great deal of it. Where this site knows about a change it is stated above, or corrected in the text below; anything else here describes the game as it was, not as it is.
Character Stats
The stats have been fully reworked. You no longer require 2 points per stat with an increasing cost every 10 points:
We also kept the great pre-modern Breakpoints ! However, added in a linear growth, so players can get small, extra bonuses when they have multiples of 10 in a given stat.
Another thing is that the behavior of the status have also been adjusted:
Besides the above points. Most skills now have a Stat-based scaling added to them!
See also: Stat Changes
- Any stat up to 49 costs 1 point.
- Any stat from 50 to 98 costs 2 point.
- getting 99 in a single stat costs 3 points. This is because some equipment have bonuses for having 99 in a specific stat.
- Base level grants more weight limit per level. STR does not raise it here, though it did on the original server.
- Agility scales better with attack speed at higher amounts.
- Intelligence has a higher influence on SP regeneration.
- Dexterity has a better effect on cast time.
- Luck affects more status resistances.
Stat Changes, as the original server documented it
This is the original server's own wiki, kept because it is the only surviving description of that world. The Refuge has changed a great deal of it. Where this site knows about a change it is stated above, or corrected in the text below; anything else here describes the game as it was, not as it is.
Return to Morroc changed most of the stat system of the game. Below you can find the biggest differences from the modern version. Anything not mentioned below should be considered to be same as default the modern version.
Quick Starter Information
- It is HIGHLY RECOMMENDED to get at least 10 points in most stats for weight, regeneration, speed, etc.
- It's not recommended to depend on healing items to handle fights. They are situational items at best now.
- Use lesser levels of spells and skills when SP is an issue. Higher level skills might provide a better burst, but a lesser DPS overall due to high costs.
- Always double check your resources, catalysts, shadow orbs, etc.
- Enjoy the journey, the game doesn't start at max level here.
Base Level
- Maximum Base Level is 150 . This is the Hard Cap.
- Level 130 is considered the Soft Cap. No Equipment requires a Level higher than 130.
- After Level 124, the gains from each level decrease the higher your level is.
- Base Level is no longer a modifier for bonuses on any skill.
Job Level
- Maximum Job Level varies per job class.
- Job stat bonuses are no longer granted as you level up. They are completely removed.
- Job Level is the only factor on increasing crafting success rates for Black Plague and Blast Juggler .
- Judge has specific skills that increase in power according to the player's Job Level.
Status Growth
- All Stats have a Breakpoint Bonus when they are multiple of 10. This includes Base + Bonus amounts.
- Max Stat points for any stat is 99. There's no limit on bonuses from items/skills.
- Skills now have direct stat point scalings. You can for example have a skill with +2% per AGI scaling (giving you 60% extra damage with 30 AGI).
- Some cards and equipments can add stronger/new scaling to skills.
- Stat points no longer require 2 points +1 every 10 points to increase.
- Stat points now require 1 point up to 50, 2 points up to 98, and 3 points for 99.
- The amount of stat points granted varies by level. Multiple of 10 usually grant bette bonuses.
- Certain items require 99 in a given stat to activate strong bonuses.
- A Lv150 character has enough points to get 99 in 3 stats, and having 3 other stats at 1.
Natural Regeneration
- HP Regeneration tick is every 2 seconds (vs 6 seconds from vanilla, 3x faster).
- SP Regeneration tick is every 1.2 seconds(vs 8 seconds from vanilla, 6,6x faster).
- SP Regeneration when equipped with Revolvers ( Judge ) is tripled . Job has a very small SP pool.
- SP Regeneration happens in movement. Specific bonuses enable HP Regen in movement.
- All Regeneration happens even in combat.
Physical Attack Card Bonuses
- Card bonuses follow a unique formula due to the balance of status and equipment.
- Bonuses are applied 1/2 to Status Attack and 1/2 to Equipment Attack.
Size Penalty for Weapons
- Weapon Size modifiers has been reworked.
- Size Penalty used to be 50%/75%/100%
- New Size Penalties: 80%/90%/100%
- Scythes, Decks and other unique Weapons deal 100% to all sizes.
Death and Warping
- Invincibility Time reduced by 70% when entering new map.
- Transition "black screen" time reduced by 80%.
- Respawning revives you with 50% HP and 25% SP.
- Teleport has 30 seconds cooldown, Fly Wing has 60 seconds cooldown.
Damage Delay
- Stunlock duration for players and monsters reduced by half.
- Monsters may have delayed damage skills, you can see this with skills that decrease your HP but the number takes a moment to show up.
- This delay can be used to heal up right before a high nuke damage hit.
Consumables
- Potions Weight GREATLY increased.
- Potions prices GREATLY increased.
- Potions now have a 5 second cooldown.
- Potions healing variation removed.
- Most healing items removed from the game.
- Added Kafra Elixir to Kafra Services . Default Kafra elixir amount is 2. This amount can be increased with specific items.
- Kafra Elixir can be refilled for free at any Kafra, they recover 50% HP/SP and have a 5 second cooldown.
Experience
- EXP is fully received if monster is between 3 levels lower than player or up to 5 levels higher.
- EXP received increases by 3% per level when monster is 6 levels or higher than player, up to 130% at 15 levels. Only 1% EXP is received for monsters 16 levels or higher.
- EXP received decreases by 15% per level when monster is 4 levels or lower than player, up to 10% at 9 levels. Only 1% EXP is received for monsters 10 levels or lower.
- On average, You need your level x 1.5 to level up, this value can fluctuate based on dungeon difficulty, density, monster difficulty, etc.
- EXP penalty on death is 5%.
- This is to incentivate progression of areas and exploration.
MVP
- MVP monsters have 50% final damage reduction.
- All MVPs have 15% chance to drop a unique costume.
- All MVPs have half their level as chance to drop a MVP Rewards Box.
- Ankle Snare duration reduced by 95%.
- No longer can rude-teleport.
- MVPs have a unique Relic System in place, where monsters from their area have a 0.10% chance to drop their Relic. Using the Relic on the correct MVP map will summon the MVP to fight (usual rules of Free-For-All apply).
- MVPs still have their random time based spawn and locations. Relic Summons are an extra.
Zeny
- Equipments are sold to NPCs for a small fraction of their value.
- Monsters drop zeny on kill. This value can be increased with items.
- Overall zeny generation is greatly reduced and no longer has items that provide a ton of it (Gold, Witherless Roses, Crystal Mirrors, etc).
Attack speed
Each job has its own base attack speed limit, and the Refuge went back through the ones that were simply strange.


Base Aspd Limit Table, as the original server documented it
This is the original server's own wiki, kept because it is the only surviving description of that world. The Refuge has changed a great deal of it. Where this site knows about a change it is stated above, or corrected in the text below; anything else here describes the game as it was, not as it is.
Every job starts at 180.
This page was never archived before the original wiki went offline. What is above was transcribed from it by another community while it was still up, so it is a copy rather than the source, and it is newer than the rest of this material.
Elements
The element table is the difference between a comfortable dungeon and a wall. Endows are cheap; ignoring them is not.
Down the side, the element doing the hitting. Across the top, the element being hit. The cell is how much of the damage lands.
Element levels 1, 2 and 3
| Neutral | Poison | Ghost | Undead | Fire | Water | Wind | Earth | Holy | Dark | |
|---|---|---|---|---|---|---|---|---|---|---|
| Neutral | 100% | 75% | 75% | 100% | 100% | 100% | 100% | 100% | 90% | 100% |
| Poison | 125% | 50% | 75% | 75% | 100% | 100% | 100% | 100% | 90% | 100% |
| Ghost | 125% | 125% | 50% | 125% | 100% | 100% | 100% | 100% | 90% | 100% |
| Undead | 100% | 125% | 125% | 50% | 100% | 100% | 100% | 100% | 90% | 100% |
| Fire | 100% | 100% | 100% | 100% | 50% | 75% | 100% | 125% | 100% | 90% |
| Water | 100% | 100% | 100% | 100% | 125% | 50% | 75% | 100% | 100% | 90% |
| Wind | 100% | 100% | 100% | 100% | 100% | 125% | 50% | 75% | 100% | 90% |
| Earth | 100% | 100% | 100% | 100% | 75% | 100% | 125% | 50% | 100% | 90% |
| Holy | 110% | 110% | 110% | 110% | 90% | 90% | 90% | 90% | 50% | 125% |
| Dark | 90% | 90% | 90% | 90% | 110% | 110% | 110% | 110% | 125% | 50% |
Element level 4
| Neutral | Poison | Ghost | Undead | Fire | Water | Wind | Earth | Holy | Dark | |
|---|---|---|---|---|---|---|---|---|---|---|
| Neutral | 100% | 50% | 50% | 100% | 100% | 100% | 100% | 100% | 75% | 100% |
| Poison | 125% | 25% | 50% | 50% | 100% | 100% | 100% | 100% | 75% | 100% |
| Ghost | 125% | 125% | 25% | 125% | 100% | 100% | 100% | 100% | 75% | 100% |
| Undead | 100% | 125% | 125% | 25% | 100% | 100% | 100% | 100% | 75% | 100% |
| Fire | 100% | 100% | 100% | 100% | 25% | 50% | 100% | 125% | 100% | 75% |
| Water | 100% | 100% | 100% | 100% | 125% | 25% | 50% | 100% | 100% | 75% |
| Wind | 100% | 100% | 100% | 100% | 100% | 125% | 25% | 50% | 100% | 90% |
| Earth | 100% | 100% | 100% | 100% | 50% | 100% | 125% | 25% | 100% | 75% |
| Holy | 110% | 110% | 110% | 110% | 75% | 75% | 75% | 75% | 25% | 125% |
| Dark | 75% | 75% | 75% | 75% | 110% | 110% | 110% | 110% | 125% | 25% |
Levels 1, 2 and 3 hold the same hundred cells, which is why they are printed once. Level 4 is the only one that bites, and it bites in one direction: nothing gains, and every penalty deepens.
Holy and Dark
- Holy
- Ten per cent more damage against all four Corporal elements, at every level. Against the four Natural ones it is the weaker side instead.
- Dark
- The mirror of it: ten per cent more against all four Natural elements, at every level, and the weaker side against the Corporal four.
- Holy and Dark
- Opposed. Against each other they use the ordinary bonus rather than the flat ten.
- Resisting them
- Being hit by Holy or Dark costs a Corporal or Natural element ten per cent up to level 3, and a quarter at level 4. The wiki says ten at every level; the server's table is what is printed above.
Which one to use
- Defending
- Wear the element that is hitting you. Failing that, wear the one that is strong against it.
- Attacking
- Use the element that is directly strong against theirs.
- In general
- Holy against the Corporal four, Dark against the Natural four.
Read from the server's own table rather than typed, so a balance pass reaches this page as one command. An element level is the monster's, and the database prints it beside every monster.
Elemental Table, as the original server documented it
This is the original server's own wiki, kept because it is the only surviving description of that world. The Refuge has changed a great deal of it. Where this site knows about a change it is stated above, or corrected in the text below; anything else here describes the game as it was, not as it is.
In Return to Morroc, elements have an impact on the gameplay but no longer are the make or break they once were. The entire elemental table was changed.
The workings of elemental damage for physical attacks (both melee and ranged) is completely changed in place of a fixed modifier, regardless of monster level.
The elements are reworked into 3 groups: Corporal Elements , Natural Elements and Special Elements
Endow Skills
Return to Morroc has very few endow skills:
The only ways other than this to get full elemental benefits is either with elemental weapons/ammo or the Elemental Focus .
- Seven Winds, Shinobi Skill, allows choosing between any non-neutral element except poison.
- Enchant Poison, Thief Skill, allows enchanting weapon with poison element and a chance to cause poison status.
- Burning Scythe, Trickster Skill, enchants the scythe with fire element and boosts fire magic power.
- In case any of these skills is used, all damage will be converted to the element, including statusATK and WeaponATK.
- You can also get elemental bonuses from some skills, such as Reaper Form making your damage Dark, or Dracomancer's dragon breath changing according to current buff activated.
Elemental Focus
Elemental Focus is a sub-system of the magic of Return to Morroc. Natural element magic (Fire/Water/Earth/Wind) can generate or consume Focus for their element.
The Stacks can be seen as elemental icons around the player.
Focus duration is 60 seconds . Using lower level magic can refresh an amount of stacks equal to that point, for example:
When a Player has 10 Stacks , they get a bonus besides skills interactions:
Some unique skills (such as Mystic's Unholy Light ) can get unique interactions according to the amount of element focus of the player.
Using a spell of a different element will change the focus to that element, losing any stacks of the previous element.
- Skills that generate focus have increasing cast times and cooldowns with higher level, but generate more stacks. Using lower level skills won't increase the stacks past their current skill level.
- Some Skills are boosted according to the current focus element and stacks amount.
- Autospell does generate stacks, either from items or skills.
- Casts Lv 10 Flaming Petals, generates 10 Fire Focus.
- Casting Lv5 Flaming Petals will renew the duration of 5 Fire Focus stacks, the remaining 5 will vanish when the timer is up.
- This can be repeated, so Spamming lower level magic after generating the Lv10 Focus to keep it up is a viable strategy.
- A good magic user will know to not drop the stacks after they are obtained by keeping the offensive and weaving different spells into the rotation.
- They get endowed with that element for duration, with full bonuses and penalties.
- They deal 10% bonus damage vs the target advantage element (Like Water Focus vs Fire Enemy, you deal 10% extra damage).
- This makes some physical builds weaving magic, even if only for the endow, a viable strategy in some cases.
Elemental Modifiers
Elements apply to final damage. If a target is Fire Lv2 for example, it'll receive 125% damage from any source.
Contrary to the modern version, Elemental endows apply to the entire attack damage on Return to Morroc, not just to weaponATK.
Element Levels
Damage bonus/penalty according to elements has been changed.
Instead of varied amounts of bonuses vs elements, they have fixed amounts up to Lv3.
Lv4 monsters require specific approaches to fight, specially if they are Holy/Dark.
Corporal Elements
The 4 Corporal Elements are: Neutral , Ghost , Undead and Poison .
- Neutral has no interaction with Undead, is weak vs Ghost and Poison. Neutral has no bonus damage vs anything.
- Poison is strong vs Neutral, weak vs Ghost and Undead.
- Ghost is opposed to Undead, meaning both are strong vs each other. Also is strong vs Poison and Neutral.
- Undead is opposed to Ghost, meaning both are strong vs each other. Also is strong vs Poison.
Natural Elements
The 4 Natural Elements are: Fire , Water , Wind and Earth .
- Fire is strong vs Earth and weak vs Water. No interaction with Wind.
- Water is strong vs Fire and weak vs Wind. No interaction with Earth.
- Wind is strong vs Water and weak vs Earth. No interaction with Fire.
- Earth is strong vs Wind and weak vs Fire. No interaction with Water.
Special Elements
The 2 Special Elements are: Holy and Dark .
- Special Elements have a unique interaction with other elements:
- Holy is strong vs all 4 Corporal Elements(Neutral,Poison,Ghost,Undead). It has 10% extra damage and 10% extra resistance vs them, regardless of Level.
- Dark is strong vs all 4 Natural Elements(Fire,Water,Wind,Earth). It has 10% extra damage and 10% extra resistance vs them, regardless of Level.
- Holy and Dark are opposed to each other. They have regular damage bonus and resistance vs each other, like other elements.
Short Guide
Strongest Defensive Choice : Use same element as the attack received. If not available, use element strong vs attack received to mitigate damage.
Strongest Offensive Choice : Use element that is directly stronger vs enemy element for bonus damage.
Best Overall Use : Use holy vs corporal elements, use dark vs natural elements.
Combos and rotations
Some skills read what you cast before them. This is the layer most players discover late and wish they had known about at level 30.
Combo and Rotations, as the original server documented it
This is the original server's own wiki, kept because it is the only surviving description of that world. The Refuge has changed a great deal of it. Where this site knows about a change it is stated above, or corrected in the text below; anything else here describes the game as it was, not as it is.
In Return to Morroc, spamming a single skill over and over is the least efficient way to play (Unless you're a Jester , of course.), multiple cooldowns, costs, variations and combo interactions exist.
There are multiple ways skills can interact with one another to enable combos.
Direct Combo
Direct combo skills are skills you need to use right after the first skill, they cannot be used otherwise.
Examples:
- Mechanically they work exactly like old Monk's Combos.
- Some can also be started at will, without needing a random proc.
- Some skills can be used without a combo, but they may have diminished effects.
- Judge's Absolution , it's core skill, deals extra normal hits quickly against an enemy and needs a "Double Attack" proc from the passive Akimbo Mastery to be used. The skill also deals more hits according to skill level and current job level of the user. Violent Barrage also has the same requirement.
- Thief's Cross Ripper Slasher can only be used if you have rolling counters, acquired from using Rolling Cutter and not moving. It also deals higher damage according to the current amount of counters, up to 3.
- Executioner and Gravekeeper's Executioner Skills must be used one after the other in a specific order, with the last hit either being Cursed Coffin or Desolated Burial, both dealing critical chance damage, one being AoE and the other hitting harder.
Synergy Combo
These are not literal combos but they are skills that complement the effectiveness of one another directly, and work better when used with planning.
A few Examples:
Easy: Illusionist's Mist Rotation :
Illusionist's Heal Bomb :
Medium: Black Plague's Poison Rotation :
Hard: Sinner's Final Arrow Stack :
- There are no restrictions or requirements for using any of these, they also have no direct bonuses.
- These combos can be hard to pull-off without practice or management of resources.
- Use Illusion of Mist to cause Crystallize status.
- Real Magic Attack and Illusion of Vermillion deal bonus damage vs Crystallize targets.
- Use Illusion of Healing on target to reverse healing effects used on it.
- Use Heal Lv10 with a manual along with healing power gear to kill the enemy with pure heal damage.
- Apply Venom Mark to enemy, improving poison element damage they receive.
- Apply Poison Status with Envenom, Venom Splasher, Enchant Poison...
- Use Death Cloud to cause Inner Poison status, improving all poison damage further.
- Use Venom Buster to deal poison elemental damage, with a double modifier if target is poisoned, while dealing extra damage due to Venom Mark and Inner Poison Status
- Note: This combo doesn't work vs bosses due to their immunity to poison. They however can still receive Venom Mark.
- Prepare a ton of SP with either SP cost reduction, SP regen, or SP refill stuff.
- Get all coins from Coin Flip as needed and refill them as needed.
- Activate Sniper's Nest to improve final damage.
- Activate Ready to Rip to boost attack % power.
- Activate Inquisition Resolve to add a chance for auto attacks to deal up to 6 hits.
- Activate Killer Instinct for bonus status and flat ATK.
- Activate Last Inquisition for ranged damage modifier bonus.
- Activate Final Arrow to stack all the bonuses and modifiers on a single auto attack. This bonus is lost if you get hit or any of the previous buffs run out.
- Auto attack an enemy to deal massive damage. Due to Inquisition Resolve, this bonus can hit up to 6 times (at a very low chance).
- This is one of the highest damage dealing hits in the game.
- Note: This combo can be used in smaller sizes and variety according to ease, logic and preparation.
Rotations
Rotations are just varied ways to string multiple skills that make sense in sequence, regardless of their combo interactions.
Examples:
Assassin Dagger/Sword AoE:
Rogue In-Out:
Another variety of rotations include status effects to boost damage.
Example:
Dracomancer Burning:
- Burst Petals hit to distant targets.
- Shadow Slash to teleport near it.
- Fan of Knives to deal AoE damage.
- Throw Molotov/Acid.
- Face-off or Backstab to gap close to enemy.
- Hide to dodge any skills, Sneak Attack follow up from hide.
- Decoy to move out.
- Cause Burning status with Dragon Breath (or other cards/skills).
- Dragon Claw deals extra damage vs burning targets.
A skill can leave you in one of three states: Combo Ready, Cast Ready or a job stance. All three are defined in the codex, and underlined wherever they appear.
Innate and unique bonuses
Equipment does more than add numbers. Bouncing skills, repeating skills, autocasts and leech all live here.


Innate Fixed Bonus, as the original server documented it
This is the original server's own wiki, kept because it is the only surviving description of that world. The Refuge has changed a great deal of it. Where this site knows about a change it is stated above, or corrected in the text below; anything else here describes the game as it was, not as it is.
In Return to Morroc, EVERY equipment has what is called " Innate Bonus ", these are bonuses that you will always find on these items, regardless of other stats. The value in these items don't always mean an item is better or worse, but it's a good way to know what to expect from them.
The innate bonus of any equipment can be found on the first block of their description window.
Some special items might break the average innate of it's type according to its theme.
Accessories and headgears have no innate bonuses, but they may have random options.
Weapons
You can check which weapon each job can use by checking their fixed passive in each skill tree. Or their respective wiki page.
- Note: Katars in Return to Morroc have 1.5x bonus critical rate, for balancing reasons.
| Weapon | Bonus | Variation | Details |
|---|---|---|---|
| Daggers | Double Attack | Lv1 ~ Lv10 | Chance to attack twice with auto-attacks. 10% per level. |
| Swords | Defense Pierce | 1% ~ 25% | Ignores a portion of target's total defense. |
| Axes | Splash Range | +1 ~ +5 | Increases area of auto-attacks by 3x3 per range. Doesn't Stack. |
| Bows | Range and Sp Cost | +0 ~ +10 / 0 ~ 25 | Increases range of attacks and most skills. Increases SP cost per auto-attack. |
| Katars | Critical Damage | 1% ~ 25% | Increases the damage dealt with critical attacks. Also affects skills that can be critical. |
| Scythes | Leech Power | 1 ~ 100% | Scythes drain HP on physical damage. Its the amount of damage dealt transformed into HP. |
| Decks | SP Cost Reduction | 0 ~ 30% | Reduces the SP cost of skills. |
| Spears | Dragon Thrust | Lv1 ~ Lv9 | Enables use of Dragon Thrust Skill. 2 cells range. |
| Wyrm Spears | Dragon Thrust | Lv2 ~ Lv10 | Enables use of Dragon Thrust Skill. 3 cells range. |
| Illusion Gloves | Autospell Chance | Varies | Chance to autocast various magic, chance and power varies. |
| Revolvers | Varies | Varies | Varies by weapon crafted. Check Judge Headquarters for details. |
| Bone Swords | Dragon Skill | 1 ~ 25% | Autocast chance of various dragon skills. |
| Codex | Abracadabra Cooldown Reduction | 1 ~5 seconds | Abracadabra autocasts random skills, unique to Mimic . |
Shields
Shields come in 3 varieties. Round shields can also be called Square Shields. All of them allow the use of shield-only skills.
| Shield | Bonus | Variation | Details |
|---|---|---|---|
| Arm Guard | Auto Guard | Lv1 ~ Lv5 | Lighter, Lower Auto Guard levels, Might include offensive/flee bonuses. |
| Round Shield | Auto Guard | Lv5 ~ Lv10 | Balanced, Stronger Auto Guard levels, Focuses on utility bonuses. |
| Heavy Shield | Auto Guard | Lv1 ~ Lv10 | Heavier, Balanced Auto Guard levels, Focuses on defensive power. |
Armors
Return to morroc armors come in a variety of 3. Light, Medium or Heavy.
| Armor | Bonus | Variation | Details |
|---|---|---|---|
| Light Armor | Small HP %, Large SP % | 1% ~ 25% | Low Weight, usually favors Magic Defense. |
| Medium Armor | Medium HP %, Medium SP % | 1% ~ 25% | Average Weight, has balanced Defense and Magic Defense. |
| Heavy Armor | Large HP %, Small SP % | 1% ~ 25% | Heavy Weight, usually favors Defense. |
| Garment | Bonus | Variation | Details |
|---|---|---|---|
| Light Garment | Average Perfect Dodge | 1 ~ 10 | Low Weight, usually favors Magic Defense. |
| Medium Garment | High Perfect Dodge | 1 ~ 15 | Average Weight, has balanced Defense and Magic Defense. |
| Heavy Garment | Low Perfect Dodge | 1 ~ 5 | Heavy Weight, usually favors Defense. |
| Shoes | Bonus | Variation | Details |
|---|---|---|---|
| Light Shoes | Average Movement Speed | 1% ~ 10% | Low Weight, usually favors Magic Defense. |
| Medium Shoes | High Movement Speed | 5% ~ 15% | Average Weight, has balanced Defense and Magic Defense. |
| Heavy Shoes | Low Movement Speed | 1% ~ 5% | Heavy Weight, usually favors Defense. |
Unique Bonuses, as the original server documented it
This is the original server's own wiki, kept because it is the only surviving description of that world. The Refuge has changed a great deal of it. Where this site knows about a change it is stated above, or corrected in the text below; anything else here describes the game as it was, not as it is.
New ways to play and build
Return to Morroc may feature unique bonuses and penalties to equipment not usually found in the original game. this page denotes some of these systems and bonuses.
These bonuses may be present in set bonuses, special items or other varied ways.
Currently Implemented Bonuses
| Bonus Name | Item Types | Variations | Usually found in |
|---|---|---|---|
| Skill Autocast | All Types | Skill A has X% chance to autocast Skill B. Usually a limited skill. | Shadow Set bonuses |
| DEF/MDEF Pierce | All Types | Ignores X% of the Defense or Magic Defense of the enemy | Multiple Locations |
| Damage vs X +Y% | All Types | Unlike classic, cards and items that boost race/size/element damage affect both Physical and Magical Damage. | Cards |
| Attack Range + X | Weapons, Headgears and Cards | Increases the range of auto attacks and some skills. core feature of Offhand Daggers, from Shadowseers | Offhand Daggers, Unique items |
| Dragon Soul Lv: X | Draco Orbs | Reduces the cooldown of the Dragon Soul skill according to current Dragon Soul Level. | Dragon Monsters and Bosses |
| X Damage Reduction +y% | Special Items | Reduces final damage taken by X (Physical/Magic/Special/Critical/All) type of damage in an absolute amount. | Unique Items and Cards |
| Recover X HP/SP on Kill | All Types | Recovers HP/SP by a specific amount when an enemy is killed in a specific way. Does not work with traps, birds or other special damage types. | Specific Items |
| Leech Rate | All Types | Chance that physical damage will recover partial damage dealt. All Scythes have 100% Leech Rate. Different bonuses to Rate are individual chances. | All Scythes, cards |
| Leech Power | All Types | Amount healed from Leech Rate. Different bonuses to Power stack. | All Scythes, equipment |
| Bouncing Bonus | Special Items | Indicates chance that a skill will repeat on enemies nearby or on the original target if isolated. Skills can have increasing/decreasing power per bounce. | Unique Equipment |
| Skill Splash | Special Items | Skills that originally are single target may splash. They may or may not have bonus/penalty damage. | Unique Equipment |
| Skill SP Cost | Multiple Items | Specific or all skills may have reduced or negated SP costs. | Decks, other equipment |
| Activation | Special Items and Skills | Skill/attack may activate a special condition like Combo Ready, a bonus, a transformation and so on. | Dracomancer's Dragon Soul skill, Cards |
Currently Under Testing Bonuses
| Bonus Name | Item Types | Variations | Usually found in |
|---|---|---|---|
| Auto-Attack Potential + X% | Unknown | Breaks the cap on auto-attack damage. Auto Attack damage is capped by effective Level and DEX of the user. | Unknown |
| Attack Speed Limit + X | Unknown | Increases the ASPD cap for the specific job by X. | Unknown |
Dying, and the Shadow you leave behind
Death is not a loading screen. It puts something hostile in the room with your party.


Shadow System, as the original server documented it
This is the original server's own wiki, kept because it is the only surviving description of that world. The Refuge has changed a great deal of it. Where this site knows about a change it is stated above, or corrected in the text below; anything else here describes the game as it was, not as it is.
Shadows are the curse of The Mark given form. They are the main reason Orphans are hated by so many people around New-Midgard.
The Mark
- The Mark is a red glow in the eyes of every Orphan. It's commonly called Morroc's Mark due to it appearing during the mass disappearances after Morroc's Death.
- Orphans who carried the mark have vanished for between 4 to 5 years, leaving no trace behind and having no memory of where they have gone to. They aged normallly.
- The mark has no other known properties apart from creating Shadows.
Shadow Mechanics
- Whenever a player dies in any dungeon (and only dungeons), a Shadow will spawn. The type of shadow depends on the dungeon ranking.
- Each shadow has a specific behavior, and will randomly attempt to Self-Destruct whenever anyone comes near it.
- If the shadow is defeated before it explodes, the last player who died on the map is revived with partial HP/SP. .
- Multiple player deaths can cause multiple shadows to spawn, all must be defeated to revive a player. Only the last player who died is revived.
- If the shadow explodes it deals heavy area damage based on how much HP it had left. Damage is fixed at 100 per HP left. Shadows take 1 damage from any source.
Shadow Types
Rank E Shadow
HP: 10
Maximum Damage: 1000
Behavior: This shadow won't move or attack, and will self destruct after 15 seconds of cast time.
Rank D Shadow
HP: 15
Maximum Damage: 1500
Behavior: This shadow will quickly move close to any item on the floor and self destruct after 10 seconds of cast time.
Rank C Shadow
HP: 20
Maximum Damage: 2000
Behavior: This shadow might use Pneuma or Safety Wall around and self destruct after 10 seconds of cast time.
Rank B Shadow
HP: 25
Maximum Damage: 2500
Behavior: This shadow won't move but deals constant hits of 1 damage to hitlock players, will self destruct after 10 seconds of cast time.
Rank A Shadow
HP: 30
Maximum Damage: 3000
Behavior: This shadow will cast magic on players to cause negative status, will self destruct after 8 seconds of cast time.
Rank S Shadow
HP: 50
Maximum Damage: 5000
Behavior: This shadow will slowly walk towards a player, and may instantly teleport to them, will self destruct after 3 seconds of cast time.
Shadow Cards
Shadows can also drop cards, all cards have 1% drop rate like common monsters.
| Name | Slot | Bonus |
|---|---|---|
| Rank E Shadow Card | Accessory | SP+10% |
| Rank D Shadow Card | Shoes | Move Speed+10% |
| Rank C Shadow Card | Garment | HP+10% |
| Rank B Shadow Card | Armor | DEF+10% |
| Rank A Shadow Card | Headgear | MDEF+10% |
| Rank S Shadow Card | Weapon | ATK+3%, MATK+3% |
| Combo | Stat Bonus | Extra Bonus |
|---|---|---|
| 6 Shadow Cards | All Stats +5 | Def Pierce +10%, MDef Pierce +10% |
Dungeon ranks
Every dungeon carries a difficulty tier. Anything can be done solo with enough preparation, and the rank tells you how much.
Ranking System, as the original server documented it
This is the original server's own wiki, kept because it is the only surviving description of that world. The Refuge has changed a great deal of it. Where this site knows about a change it is stated above, or corrected in the text below; anything else here describes the game as it was, not as it is.
Tailor-made Challenges
Return to Morroc dungeons are always split in two types: Dungeons and Distortion Dungeons
regardless of the type of dungeon a player visits, they will always have their rank, which denotes its difficulty and what Shadow spawns when a player dies there.
Visit Combat Reworked for details on how the combat works and it's dynamics.
- Every dungeon can be handled solo by a sufficiently prepared player, including it's MVP. There are no cheap one shots.
- The recommendations are for reasonable leveling without major struggles. Ignoring some mechanics can still result in death over multiple mistakes.
- Being overleveled may help mitigate some difficulty from the dungeons, at the cost of EXP.
Ranks
The Ranks that shows the difficulty levels can be found on the World Map (Default shortcut: CTRL + ' ) and map banners when a map is entered.
In most cases, a higher rank dungeon will have better drops and provide more exp, as long as a player/party can handle it's difficulty. Lower rank dungeons may sometimes present mechanics from higher rank dungeons under specific circunstances.
- Distortion Dungeons are only available in Ranks B , A or S .
What spawns when you die there
The rank decides which Shadow you leave behind. These are the six of them.
-

-

-

-

-

-
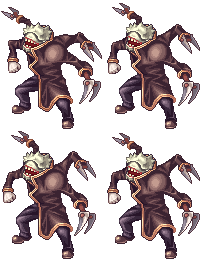


Every dungeon and the rank it carries is in the table on the world page, which is sortable and searchable. Six paragraphs describing six ranks were the same information, arranged worse.
Material on this page is transcribed from the original server's own wiki, recovered from the Internet Archive, and from our own posts. Where the two disagree, the posts win and the difference is called out in a purple box. A few pages were never archived and are marked where they appear. Numbers may still move before launch.