

Home/Start Here
Start here
Everything between waking up with no name and hitting the soft cap, in the order you will need it.
You wake up as an Orphan
No memories, no name, and a reflection that will not stop talking to you. That is the whole of your character creation.


Orphan, as the original server documented it
This is the original server's own wiki, kept because it is the only surviving description of that world. The Refuge has changed a great deal of it. Where this site knows about a change it is stated above, or corrected in the text below; anything else here describes the game as it was, not as it is.
Orphan
The Orphan is a cursed person. Every Orphan carries The Mark with them. Orphans create a Shadow when they die in specific places where negative energy is gathered, since Shadows attempt to explode when they die, they are very dangerous to society. For this reason, most people don't like having Orphans near them.
Orphans don't have access to the original jobs due to the risk they bring. Only the Thief, and in turn, Assassin and Rogue guilds accept Orphans, that's because those guilds would always be seen as outsiders by the common people, so they embraced these new outcasts from society.
Some alternative associations also seem to be taking Orphans...
An Orphan can also become a Merchant, as long as it sticks to the rules of the Merchant Association of Alberta and refrain from training and stick to a peaceful life of markets and trading.
Extra information
- Orphans have this name because when a person receives The Mark, their whole family supposedly dies or vanishes. Nobody is fully sure what happens.
- Available Weapons: Daggers
- When an Orphan gets to Lv99 without dying, they receive +10 bonus to all stats. They also cannot job change anymore if they do this.
The Orphanage
The hub. Every service you need before level 50 is in one building, and the Refuge gave the whole place a visual pass.


The Orphanage, as the original server documented it
This is the original server's own wiki, kept because it is the only surviving description of that world. The Refuge has changed a great deal of it. Where this site knows about a change it is stated above, or corrected in the text below; anything else here describes the game as it was, not as it is.
The Orphanage is the best place for an Orphan to be in New-Midgard. A safe house born from the wishes of people to protect those who are less fortunated, and cursed.
It's a community effort to ensure the Orphanage continues to grow and provide better support for its people.
No matter how hard the path is, having a place to call home will always be something every orphan will have... as long as they take care of it.
Orphanage Level
The Orphanage grows with donations from players. Specific services and features will be available or expanded when the orphanage reaches higher levels.
Donating also rewards players with Donation Points that can be exchanged for costumes and rewards with some NPCs.
There are 3 ways to make the donations to the Orphanage:
When the orphanage levels up, EVERY CHARACTER currently online receives +50% EXP for 30 minutes . This will be broadcast and the Orphanage music will change briefly.
The money required and benefits for each level can be seen below.
- Lucy Guile , the Healer, provides buffs at the cost of 5.000z.
- This also rewards the player with 1 Donation Point and adds 1.000z to the Orphanage Funds.
- Amadeus Windsor , the founder, takes direct donations of 10.000z, 50.000z and 100.000z.
- This also rewards players with 10, 50 or 100 Donation Points.
- Server Events , such as a monster invasion in a city.
- If the players successfully save the city, a donation from the city might be made to the Orphanage, depending on how well players did.
Kafra Alysia
The kafra that works specifically for the orphanage. She can save your respawn point, access your storage, refill elixirs and teleport you.
- The storage access here is always free.
- Kafra Alysia has a minor quest associated with her.
- Teleports with Alysia always cost 100z for Morroc and 500z for anywhere else.
- Her teleports are always the cheapest option compared to city kafras.
- Kafra Alysia teleport variety improves every 20 orphanage levels. She also has unique teleport destinations.
Healer
Lucy Guile takes cares of the Orphans, at no cost. She might seem cold but she's nice.
You can also pay her 5.000z for a temporary buff. You will receive all buffs already available
Duration of Buff is 5 minutes + 1 minute per orphanage level.
- Magnificat , increased SP recovery, Orphanage Level 1 or higher.
- Weapon Revest , prevents breaking and removal of weapon, Orphanage Level 25 or higher.
- Job Growth , increases job experience gained by 10%, Orphanage Level 50 or higher.
- Base Growth , increases base experience gained by 10%, Orphanage Level 100.
Kitchen
Mary Cenia is the Headchef of the kitchen, she can be a bit rought sometimes, but has a heart of gold.
You can buy food from her at a fixed price, regardless of the type or grade.
Food buffs don't stack. You can't have more than one status active at a time.
Duration of Buff is 5 minutes + 1 minute per orphanage level.
- Food can usually be bought in different cities around the world. Usually ranging from +2 to +7, as long as you find the Pub/Restaurant in them.
- Price for food around the world is always more expensive than the Orphanage.
- Every 10 Orphanage levels, the food quality increases by +1 stat point, up to +10 of a stat at Orphanage Level 90.
Memory Fountain
A fountain that you can see the reflection of your life. Allows you to reset your stats and skills.
- The fountain reflects who you are now.
- Price for resets is 500z per base level.
- Price is reduced by 1% per orphanage level, making the fountain free at Orphanage Level 100.
- There's no restrictions on how often the fountain can be used.
3 Smith Brothers
The 3 Howards take care of refines, weapons and armors. They sell equipment for Orphans at convenient prices.
- The older brother refines equipment and sells ores.
- The middle brother sells weapons.
- the younger brother sells armors.
- The quality of ores, weapons and armors improves every 10 orphanage levels, up to orphanage level 50.
- very rare ores can be bought for HIGH prices at higher levels.
Card Remover
This fancy guy removes cards from any equipment.
- There is no chance of failure.
- The card remover requires Orphanage Level 25 to start his work.
Happy Girl and Big Dude
These two can provide different visuals to players.
- Happy Girl can sell hats directly to players, at low prices (mostly).
- She also sells zodiac Diadems, that provide reasonable bonuses, but have no slot.
- Happy Girl also sells boxes containing a random SLOTTED hat of the same type above
- Zodiac crowns are also obtained from boxes with a random hat inside. They are slotted variations of the diadems, and their bonuses are refine-based.
- You can also get costume versions of all those items with her by spending Donation Points .
- Big Dude provides garment costumes at very high amounts of Donation Points .
- Big Dude sells garments when the Orphanage Level is 50 or higher .
Job Changers
A variety of places can start your job change around the orphanage.
(Jester, Vagabond and Raider jobs have other starting locations.)
- The Merchant Representative can turn any Level 1/1 Orphan into a merchant permanently.
- Lydia, the Thief can provide job level 10 Orphans with a quest to become a thief.
- Mrs. Sorin can start Orphans on the path of the Trickster
- A broken clock in the orphanage can bring back memories needed by a Illusionist.
- A serious man is looking for strong orphans to start training as a Judge.
- The Unchained room allows people ready to break their limits to push their jobs to the limit.
Wandering Minstrel
The Wandering minstrel will always provide updated information about the world to Orphans.
- As patches and updates are made, the Minstrel will provide a small lore-friendly block of information about the new content.
- It also provides overall information about the world.
Orphanage Level prices
Zeny required is a community goal. It can be donated from any player, at any time.
First 30 Levels:
- Any Zeny donated above the required amount is LOST
- Lucy the healer will never increase the level of the Orphanage, only an Amadeus Windsor donation will increase the level.
- The donation amounts from Lucy the Healer can only help with overall progress.
- Zeny required currently can be checked by asking for progress from Amadeus Windsor.
- Zeny needed increases by 10.000z per current level. The funds go back to zero every level.
- Some events and community achievements ingame might provide a boost to orphanage level progress, such as saving a city from an invasion
- There's no limitation on how fast the Orphanage can level, theoretically, players can get it to Lv100 in a single day, with no limitations or daily stuff.
| Current Level | Zeny for next level |
|---|---|
| 1 | 10.000z |
| 2 | 30.000z |
| 3 | 60.000z |
| 4 | 100.000z |
| 5 | 150.000z |
| 6 | 210.000z |
| 7 | 280.000z |
| 8 | 360.000z |
| 9 | 450.000z |
| 10 | 550.000z |
| 11 | 660.000z |
| 12 | 780.000z |
| 13 | 910.000z |
| 14 | 1.050.000z |
| 15 | 1.200.000z |
| 16 | 1.360.000z |
| 17 | 1.530.000z |
| 18 | 1.710.000z |
| 19 | 1.900.000z |
| 20 | 2.100.000z |
| 21 | 2.310.000z |
| 22 | 2.530.000z |
| 23 | 2.760.000z |
| 24 | 3.000.000z |
| 25 | 3.250.000z |
| 26 | 3.510.000z |
| 27 | 3.780.000z |
| 28 | 4.060.000z |
| 29 | 4.350.000z |
| 30 | 4.650.000z |
Your first job change
Ten job levels for a normal job, fifteen base levels on top for an Expert one. Every job change in the game is a quest rather than an NPC menu, and the wiki lists where each one starts.


How the tree works, as the original server documented it
This is the original server's own wiki, kept because it is the only surviving description of that world. The Refuge has changed a great deal of it. Where this site knows about a change it is stated above, or corrected in the text below; anything else here describes the game as it was, not as it is.
Path of the Orphan
In Return to Morroc, the Orphan is the only starter choice for any player. The Orphan has a multitude of paths to choose from, each with a special progression and their own rules. Minor changes in the main story or with NPC behavior might happen with different Trees.
NOTE: Specific Numeric values for skills won't be shown as they can be changed slightly over time for balance.
You can see the Job Quests for each of the jobs below.
| Orphan | |||||
|---|---|---|---|---|---|
| Thief | Trickster | Jester | Mimic | Vagabond | Raider |
| Unchained Evolutions | Revenant | Legend | Dracomancer |
| Thief Tree | |||||||
|---|---|---|---|---|---|---|---|
| Assassin | Shadowseer | Prowler | Rogue | ||||
| Blade Dancer | Shinobi | Executioner | Scoundrel | Mystic | Duelist | Deadeye | Saboteur |
| Night Raven | Satsujin | Gravekeeper | Black Plague | Arcane Master | Kingslayer | Sinner | Blast Juggler |
| Expert Classes | ||
|---|---|---|
| Judge | Illusionist | Dark Knight |
Where every job quest starts, as the original server documented it
This is the original server's own wiki, kept because it is the only surviving description of that world. The Refuge has changed a great deal of it. Where this site knows about a change it is stated above, or corrected in the text below; anything else here describes the game as it was, not as it is.
Every Job has a story in Return to Morroc.
Jobs are not only ways to play here, but also a unique identity of the player. The Job Change Quests are an essential part of this.
The Thief tree is the "regular progression" tree of the game. There are multiple job quests and paths to be taken. It's the perfect way to follow your destiny.
Thief Quest -
Start Location: Lydia the Thief, Orphanage
Required: Orphan Job Lv10
Objective: Pay the price and assist the guild by talking to Lydia on the Orphanage entrance
Prowler Quest -
Start Location: Lighthalzen
Required: Thief Job Lv50
Objective: Use the Prowler Armguard and prove you can fight the strongest enemies no matter what.
Shadowseer Quest -
Start Location: Niflheim
Required: Thief Job Lv50
Objective: Understand the path of Life and Death.
Assassin/Rogue Quest -
Start Location: Sograt Desert Guild: moc_fild16
Required: Thief Job Lv50
Objective: Clear all the trials of the assassins, including basic knowledge, evasion and intuition to choose into become an Assassin or a Rogue.
Unchained Classes Quests -
Start Location: Master Room, Orphanage
Required: Job Level 50 (Unchained Thief), Base Level 99, Job Level 50 (Unchained Assassin, Unchained Rogue, Phantom Thief)
Objective: A specific weapon with random options will be requested at a high refine level, bring the weapon to the master. The weapon will need to be at the EXACT refine level.
Specialization Quests -
Start Location: Desert Guild , moc_fild16
Required: Assassin or Rogue Job Lv50
Objective: Talk to the master to learn the details about a specialization, the master will change you into the specialization if you wish.
Night Raven Quest -
Start Location: Sky Brother, Rachel Fields
Required: Blade Dancer Job Lv70
Objective: Scout the area and prepare a escape route to save the people from the cultists. This Quest is shared with Scoundrel's quest, you'll work outside.
Black Plague Quest -
Start Location: Land Brother, Rachel Fields
Required: Scoundrel Job Lv70
Objective: Infiltrate the cultist base and help the people escape. This Quest is shared with Blade Dancer's quest, you'll work inside.
Satsujin Quest -
Start Location: Master Saito, Yuno
Required: Shinobi Job Lv70
Objective: Capture the mysterious fugitive and survive all its traps.
Gravekeeper Quest -
Start Location: Tomb Guardian, Pyramid Basement
Required: Executioner Job Lv70
Objective: Enter Loki's tomb and learn the hardships of the Assassin path.
Arcane Master Quest -
Start Location: Mystic Assistant, Geffen Fields
Required: Mystic Job Lv70
Objective: Control the 4 natural elements and be approved by the Grandmaster.
Kingslayer Quest -
Start Location: Dethroned King, Moscovia
Required: Duelist Job Lv70
Objective: Face the usurper and bring justice back to a lost kingdom.
Sinner Quest -
Start Location: High Priest Zhed, Rachel Temple Garden
Required: Deadeye Job Lv70
Objective: Find the truth about the darkness covering the holy lands.
Blast Juggler Quest -
Start Location: Mad Scientist, Lighthalzen
Required: Saboteur Job Lv70
Objective: Track down Wolfchev and make sure he pays for his crimes with his life.
The trickster path is a simple way to break the rules and make your own destiny.
Trickster Quest -
Start Location: Mrs. Sorin, Orphanage
Required: Orphan Job Lv10
Objective: Embrace the cold of your soul and change your life forever.
Revenant Quest -
Start Location: Trickster, Niflheim
Required: Trickster Job Lv70
Objective: Silence the mark and use the darkness feared by all Orphans.
The path of not having a path. You can ignore your destiny.
Vagabond Quest -
Start Location: Vagabond, Orphanage
Required: Orphan Base Level 15, Job Lv10
Objective: Ignore the world that moves around you and forge a new path, free of any expectations and rules.
Legend Quest -
Start Location: Vagabond, Dicastes Diel
Required: Vagabond Job Lv70
Objective: Understand where the energy that flows around the world comes from and gain its approval.
The true path to change your destiny and become something greater.
Raider Quest -
Start Location: Wandering Knight, Payon Forest
Required: Orphan Job Lv10
Objective: Understand the qualities of a true warrior and how to control your impulses.
Dracomancer Quest -
Start Location: Strange Person, Thanatos Tower Entrance
Required: Raider Job Lv50
Objective: Survive the fury of ancient dragons and pay the price of blood.
Sometimes a single step is all it takes. You can laugh at your destiny or change it.
Jester Quest -
Start Location: Funny Guy, Prontera Southwest
Required: Orphan Job Lv10
Objective: See the fun in the world and see how you can make everything fun.
Illusionist Quest -
Start Location: Broken Clock, Orphanage
Required: Orphan Base Level 15, Job Lv10
Objective: Learn the true use of your memories and how to transform them into power and fear.
Judge Quest -
Start Location: Leon Damon, Orphanage
Required: Orphan Base Level 15, Job Lv10
Objective: Earn the approval of all 7 royal families and become a figure of authority in New-Midgard.
Dark Knight Quest -
Start Location: Strange Mirror, Prontera Knight's Guild
Required: Orphan Base Level 15, Job Lv10
Objective: Look deep inside yourself and see the true form of a shadow.
Destiny may not be to fight.
Merchant Quest
Start Location: Merchant Representative, Orphanage
Required: Orphan Base Level 1, Job Level 1, and not higher.
Objective: Get your license and work earning honest money by selling in Alberta.
Where to go, all the way to 150
Every region and every dungeon the original build shipped, with the level range it was tuned for. This is the table people keep open in a second tab, so it is not folded away.
Who is waiting, the whole way up
One from each stretch of the climb, at the level the game has it at. There are seven hundred more.
-

-

-

-

-

-

-

-
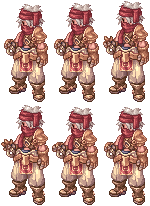
-
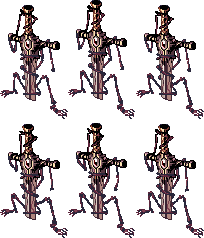
-



Regions
| Region | Monster Areas | Level Range | Related City | Location |
|---|---|---|---|---|
| Morroc Desert | 18 Maps | 1~40 | Morroc | Midgard South |
| Prontera Fields | 12 Maps | 1~40 | Prontera | Midgard Center |
| Payon Forest | 11 Maps | 1~15 | Payon and Alberta | Midgard Southeast |
| Geffen Fields | 14 Maps | 25~60 | Geffen | Midgard East |
| Fort St Darmain | 4 Maps | 55~60 | Comodo and Morroc | Midgard South |
| Comodo Forest | 5 Maps | 45~55 | Comodo | Midgard Southwest |
| Umbala Jungle | 4 Maps | 60~65 | Umbala | Midgard Southwest |
| Splendide Forest | 3 Maps | 70~75 | Mora | Bridges Comodo and Geffen Regions |
| Mjolnir Mountain | 12 Maps | 45~60 | Aldebaran | Midgard North |
| Eastern Islands | 3 Maps | 80~90 | Amatsu, Ayothaya and Malaya | Off-Coast Midgard East |
| Dewata Island | 1 Map | 80~85 | Dewata | Off-Coast Midgard West |
| Yuno Fields | 12 Maps | 50~85 | Yuno | Schwarzwald Center |
| Hugel Fields | 7 Maps | 70~80 | Hugel | Schwarzwald East |
| Einbroch Fields | 10 Maps | 55~65 | Einbroch, Einbech | Schwarzwald West |
| Lighthalzen Fields | 3 Maps | 50 | Lighthalzen | Schwarzwald West |
| Rachel Fields | 13 Maps | 85~99 | Rachel | Arunafeltz North |
| Veins Fields | 6 Maps | 105~115 | Veins, Rachel | Arunafeltz South |
| Snow Fields | 5 Maps | 75~85 | Lutie, Dicastes Diel | Schwarzwald Off-Coast East |
| Verus Lost Sectors | 4 Maps | 105~115 | Verus | Schwarzwald Underground |
| Niflheim Fields | 2 Maps | 115~120 | Niflheim | New-Midgard Underworld |
| Yggdrasil Branches | 2 Maps | 95~100 | Umbala | Yggdrasil Tree |
Dungeons
| Dungeon | Rank | Level Range | Access Location | MVP | Major Changes |
|---|---|---|---|---|---|
| Pyramid Basement | D | 1~15 | Morroc Ruins | Orphan Piamette | More passages are open on the labyrinth |
| Upper Pyramid | D | 1~25 | Morroc Ruins | Osiris | No Changes |
| Insect Society Nest | A | 15~20 | Sograt Desert | Queen Maya and Queen Scaraba | Rubble brought from the surface |
| Payon Cave | D | 15~25 | Archer Village | Moonlight Flower | added shortcuts, one less floor |
| Prontera Culvert | E | 20~30 | West Prontera | Golden Thief Bug | Added shortcut, removed 2 floors |
| Sphinx | B | 25~35 | Morroc Sphinx | Pharaoh | Added shortcuts |
| Byalan Island | D | 30~45 | Izlude Marina | Coelacanth | Lighting |
| Geffen Cave | D | 35~40 | Geffen South | Dracula | New entrance and changed order |
| Sunken Ship | C | 35~45 | Alberta Marina | Drake | Lighting, Ambience, ghosts |
| Beach Caves | D | 40~45 | Comodo North/West | Tao Gunka | Removed East floor |
| Noble's Bathhouse | A | 40~50 | Comodo | Angry Pyuriel | New Dungeon |
| Orc Dungeon | C | 50~55 | Geffen South Fields | Orc Lord Zombie | Lighting and Ambience |
| Coal Mines | E | 55~60 | Mjolnir Mountain | Noble Devourer | Changed 2F, Extra floor |
| Turtle Dungeon | A | 55~60 | Alberta Marina | Turtle General | Changed 2F, Extra floor |
| Magma Dungeon | B | 55~60 | Yuno Southeast | Muspelskoll | Removed a floor |
| Sunken Temple | B | 60~70 | Payon | General Daehyon | New Dungeon |
| Airship Crash Site | S | 60~70 | Einbroch Fields/Mjolnir Mountain | Serpens | New Dungeon |
| Clock Tower | D | 65~70 | Aldebaran | Timeholder | Removed Basement |
| Faceworm Nest | A | 65~70 | Archer Village | Faceworm Queen | New Dungeon |
| Einbroch Mines | D | 70~75 | Einbech | RSX-0806 | Removed 3F |
| Toy Factory | E | 70~75 | Lutie | Stormy Knight | Lighting |
| Regenschrim Lab | A | 70~80 | Lighthalzen | Forgotten Egnigem | Spoiler |
| Dragon Nest | C | 75~80 | Comodo Northeast | Nidhogg | New Dungeon |
| Waterfall Caves | ? | ??~?? | Malaya Field | Baroness of Despair | New Dungeon |
| Glast Heim | C | 80~95 | Geffen West | Dream of Kings | Removed filler floors |
| Ayothaya Temple | D | 85~90 | Ayothaya Field | Amon Ra | Added Minimap |
| Dewata Volcano | D | 85~90 | Dewata Beach | Scylla | Removed Caves |
| Amatsu Dungeon | B | 90~95 | Amatsu Field | Incantation Samurai | Remade Entrance and First Floor |
| Crystal Caves | C | 90~95 | Snow Fields | Brinaranea | New Dungeon |
| Juperos | E | 90~95 | Yuno Fields | Vesper | Changed progression and Lighting |
| Alchemist Fortress | D | 90~100 | Mjolnir Mountain | Failed Abomination | New Dungeon |
| Geffenia | C | 95~100 | Geffen | Bestia | New entrance, under tower |
| Abyss Lake | B | 90~100 | Hugel Field | Detale | Changed Lighting |
| Abandoned Hospital | S | 95~100 | Malaya | Soul Cage Azrael | Expanded 1 Floor |
| Ice Dungeon | B | 95~100 | Rachel Field | Ktullanux | Changed Lighting |
| Rachel Sanctuary | C | 95~100 | Rachel Temple | Gloom Under Night | Changed Lighting |
| Cursed Monastery | A | 100~105 | Nameless Island | Fallen Bishop Hibram | Unlocked camera |
| Sky Garden | A | 100~105 | Yggdrasil Branches | Sarah Irine | New Dungeon |
| Abandoned Kafra Warehouse | B | 100~105 | Aldebaran North | Kafra Manager Jenni | New Dungeon |
| Kiel Hyre Factory | C | 100~105 | Yuno Fields | Kiel D-01 | New Lighting, new theme |
| Odin Temple | ? | 105~115 | Hugel Boat | Valkyrie Randgris | New Lighting and mood |
| Opera House | A | 115~120 | Niflheim | Baroness of Sorrow | "New" Dungeon |
| Thor Volcano | A | 120~125 | Veins Field | Ifrit | Unlocked camera |
| Varmundt's Mansion | B | 130~135 | Lighthalzen Airship | Paradox Amdarais | New Dungeon |
| Death's Castle | B | 135~140 | Niflheim Field | Lord of Death | New Dungeon |
| Regenschutz Lab | S | 135~140 | Rachel Field | Absolute Seyren | New Dungeon |
| Lost Tomb of the King | S | 140~145 | Alberta | King Schmidt | New Dungeon |
| Yggdrasil Tree | E | 1~150 | Umbala | Shining Plant | Reworked Umbala Dungeon |
| Prontera Maze | C | 1~50 | Prontera North | Baphomet | Removed first floor |
| Thanatos Tower | B | 40~100 | Hugel Field | Thanatos | Removed later smaller floors, removed quest |
Second job, specialisation, final job
The main road forks twice, and the side roads do not fork at all. Here is what each one asks of you and when you reach it.


Every route through the tree, as the original server documented it
This is the original server's own wiki, kept because it is the only surviving description of that world. The Refuge has changed a great deal of it. Where this site knows about a change it is stated above, or corrected in the text below; anything else here describes the game as it was, not as it is.
Thief Tree
- The Thief is the "main" progress route for most players. It provides balanced gameplay with a large variety of choices.
- The Thief tree is for players who are ready to fight and fulfill their destiny as an Orphan.
- Thief, Assassin and Rogue can also UNCHAIN their jobs, locking them out of job changes, but unlocking new, mixed skill trees.
- Reach Job Level 10 as Orphan.
- Change into Thief.
- Reach job Level 50 as a Thief.
- Change into either Assassin(Path of Tradition) or Rogue(Path of Change).
- Get Job Level 50 as Assassin or Rogue.
- Choose one of the Specializations . This will unlock the Job Level cap from 50 to 70.
- Get Job Level 70 with the Specialization. Specializations start at Job Level 50.
- Change into final job Class. Max Job level is 70.
- There are 8 possible final jobs: Night Raven, Satsujin, Black Plague and Gravekeeper for Assassin. Arcane Master, Kingslayer, Sinner and Blast Juggler for Rogue.
- Thieves also have an unique alternative of abandoning the path and becoming Prowlers.
- Requires being a Job Level 50 Thief
- Prowler has a maximum level of 150/50
Trickster/Vagabond Tree
- The Trickster and the Vagabond are an alternative progress path for players. They provide unique mechanics and gameplay choices unlike any other.
- These trees are for players who are willing to ignore their destiny and either control Morroc's Mark (Tricksters) or ignore it completely (Vagabond).
- Reach Job Level 10 as Orphan. Vagabond also requires Base Lv 15.
- Change into Trickster or Vagabond.
- Reach job Level 70 as either.
- Change into either Revenant(for Tricksters) or Legend(for Vagabonds). Max Job level is 70.
Jester Tree
- The Jester is a unique job that plays around alternating weapons. They are an easy job to play for people familiar with classic MMO mechanics, with very short cooldowns.
- This job is for players who don't care about Morroc's Mark and sees everything as a terrible joke played on them, They completely break the main story.
- Reach Job Level 10 as Orphan.
- Change into Jester. Jester has 70 job levels.
Raider Tree
- The Raider tree is for players who want to fight for extra objectives and a bigger meaning. They must be prepared to take extra time to hunt and grow.
- This tree has a unique interaction with multiple items and NPCs, and a simple job quest. Their main story quest has little change.
- Be prepared to find harsh requirements for job quests and equipments.
- Reach Job Level 10 as an Orphan.
- Change into Raider. Raider has 50 Job levels, those job levels are very fast.
- Raider can start the Trial of Dragons to become a Dracomancer. Details for this trial are unknown.
- Dracomancers have 70 job levels and can equip Draco Orbs instead of Runes .
Expert Tree
- The Illusionist, Dark Knight and Judge jobs are considered Expert Jobs, they offer unique challenging gameplay systems and are not recommended for new players or those unprepared.
- These jobs are for players who want to have minor unique interactions with lore and systems while sticking to the regular main story.
- Illusionist has a focus on it's Puppet, Judge has unique crafted weapons and combat mechanics based on its job level.
- Judges are the only job who can access the Inner Prontera Castle Headquarters.
- Dark Knights focus on missing HP to increase the final damage of their skills.
- Reach Job Level 10 and Base Level 15 as an Orphan.
- Change into Illusionist or Judge. Illusionist has 50 Job levels and you can get all skills. Dark Knight has 70 Job Levels. Judge has 100 job levels.
Unchained Evolutions
- The Unchained evolutions are ways to progress as a Thief, Assassin or Rogue in an alternative way.
- They provide unique paths that focus on non-final job skills and new interactions.
- Unchained Thief Requires Thief Job Level 50, and can become a Phantom Thief when Base Level 100.
- Assassins and Rogues can break the limits and forever lock their job in that form when they reach Base Level 100 with no specialization.
Merchant
- The Merchant is a unique job that allows players to buy and sell items with ease.
- They cannot level up. They also have free travel between the Orphanage and Alberta.
- Merchants can get a cart anywhere, anytime, by using their exclusive item.
- Merchants have 3 skills, all learned at job change. Orphan must be Base Level 1 to change.
- To change into a Merchant, visit the Merchant Envoy near the backroom in the Orphanage.
Level 100 and the Bifrost Mirror
Distortion dungeons are the first content gate that asks you to prepare rather than just arrive.
Bifrost Mirror, as the original server documented it
This is the original server's own wiki, kept because it is the only surviving description of that world. The Refuge has changed a great deal of it. Where this site knows about a change it is stated above, or corrected in the text below; anything else here describes the game as it was, not as it is.
A Piece of Asgard in New-Midgard
The Bifrost Mirror Shard is a piece of equipment that cannot be equipped, sold, traded, dropped or stored, being 100% Character Bound.
This item is required to access the Distortion Dungeons , as it can reflect the light seen on the blue orbs that contains the distortion to be accessed. The Mirror by itself is useless, but the Eyes of the 4 Sons of Odin can power it up in order to unlock access to different distortions.
How to Obtain
The Mirror is not dropped, instead its location can be described as follows:
Where Satan Morroc was slain, the Mirror shall bring a new light to anyone who seeks to find a different path.
When the Mirror is obtained, the player can begin working on developing it, as the Mirror itself has no powers.
The Mirror can be found in moc_fild14: 345,196
The 4 Jewels
The 4 Jewels of the sons of Odin are spread around the world. they can be found in 4 different regions:
The sons of Odin walked the land and each was visiting one of the nations: Rune-Midgard, Arunafeltz, Schwarzwald and Niflheim.
The eyes must be slotted in a fixed order, only the sages in Dicastes Diel can add them.
First Eye: pay_fild06: 103,222
Second Eye: hu_fild06: 188,230
Third Eye: ra_fild03: 214,267
Fourth Eye: Niflheim: 289,262
Slotting the Eyes
The Sages in Dicastes Diel are dressed according to their expertise based on their colors. The distortions available for each can be found on the Distortion Dungeons Page.
The Eyes on a Bifrost Mirror Shard can be seen like the slots of cards on an equipment by checking the Mirror in the inventory.
This is considered a requirement for any distortion access, and once done, the character permanently unlocks that access. Regardless if the player loses a fully upgraded Mirror, they retain permanent access to those.
The Master of Vidar slots the first Jewel. The price to add the Eye of Vidar is 25.000z
This enables access to past distortions, they took place in the past and are part of history.
The Master of Vali slots the second Jewel. The price to add the Eye of Vali is 50.000z
This enables access to future distortions, they indicate a situation that may happen someday and must be avoided.
The Master of Thor slots the third Jewel. The price to add the Eye of Thor is 100.000z
This enables access to paradox distortions, they are unique places that happen in different timelines or circunstances to our world.
The Master of Balder slots the fourth Jewel. The price to add the Eye of Balder is 300.000z
This enables access to end of the world distortions, they take place in apocalyptic scenarios where all hope is lost and a great evil roams the land freely.
Distortion Dungeons, as the original server documented it
This is the original server's own wiki, kept because it is the only surviving description of that world. The Refuge has changed a great deal of it. Where this site knows about a change it is stated above, or corrected in the text below; anything else here describes the game as it was, not as it is.
Distortion Dungeons are unique dungeons that require precise gameplay while under new rules.
The biggest difference for those is that each one has a unique mechanic, either simple or complex and take place in a different time period/timeline.
Distortions are either in the Past or in the Future, and when entering one, it tells you how far from the original timeline it takes place.
They are also always Rank B or higher.
How to access a Distortion Dungeon
The Dungeons require a powered-up Bifrost Mirror , each type of dungeon requires a a different level of it. The Bifrost Mirror has 4 levels of energy, depending on the current eyes slotted into it.
You can find the location of all pieces and details about them on the page linked above.
Reminder that Bifrost Mirror and the 4 Eyes cannot be stored or traded and are character bound.
Eye of Vidar: Travel to the past.
Eye of Vali: Travel to the future.
Eye of Thor: Travel to an alternate timeline or travel deeper within a distortion.
Eye of Balder: Travel to a paradox or world-ending event.
The Eyes can be added to the Mirror in Dicastes Diel (Sage's Palace). Once obtained, they are never lost and access to distortions is permanent and unrestricted.
Distortion Gameplay
Distortions may feature different rules and mechanics in specific cases, such as movement changes or buffs/debuffs.
They also completely lock any kind of teleport or /memo.
Finally, monsters don't drop regular trash loot and the HATred dude can't be found in them, they however drop Distortion Essences
Distortion Rewards
Other than the usual monster drops of equipments, shadow sets and cards, the Distortion Essences drop from any monster in them. The drop rate is always 0.1% per monster level.
Distortion Essences are researched by the Sages in Dicastes Diel, they will exchange a large amount of those for the Sage equipment (equipment with little bonuses but 3 slots), some consumables and materials or the unique Eternal Weapons.
Distortion Dungeons available
The Distortion mechanics can be changed anytime without warning.
| Distortion | Level/Rank | Eye Required | Basic Lore | Timeline | Mechanic | MVP |
|---|---|---|---|---|---|---|
| Loki's Palace | Lv 85~90: S | Vidar | The proud Assassin's Guild yearly Assassin Cross test takes place and only the strongest has a chance of success. | 300 Years in the past | Access to the second floor requires overcoming a trial in order to face the true challenges of the guild. | Master Loki |
| Nightmare Clock Tower | Lv 85~90: B | Vali | The tower clock has come under a terrible curse and can now control the flow of time inside it. | 100 Years in the future | Players randomly get buffed with Agi Up or Agi Down inside the dungeon. | Entweihen Crothen |
| Einbroch Deadlands | Lv 85~100: B | Vali | Einbroch's greed has no end, as using a piece of Ymir's heart to drill has damaged the planet's core and caused an apocalypse. | 10 Years in the future | PvP is enabled in all maps and no rules are enforced in the area. | Mark Bearer |
| Morroc | Lv 90~100: B | Vidar | Satan Morroc has freed himself and is rampaging through the town while the heroes are trying to save the people. | 5 Years in the past | Meteors fall around the map, some of them cause damage, some don't. | Satan Morroc |
| Morroc Castle | Lv 100~105: A | Thor | The Dandelion Organization is almost finishing its ritual and bringing Satan Morroc back. | 5 Years and 1 Hour in the past | The rooms are all scrambled and the warps follow no logical order. | Evil Fanatic |
| Geffenia Antitower | Lv 100~105: B | Vidar | The forces of Himmelmez are attacking the magic city of Geffenia and exterminating everyone. | 100 Years in the past | Maps are very small and packed with strong enemies. | First Revenant |
| Kiel Hyre University | Lv 105~110: B | Thor | The students of kiel made an incredible discovery that forever changed the face of the world. | 15 Years in the future | The robots always fight in pairs. They are sturdy and immune to knockbacks and status effects. | Kiel DX-02 |
| Abyss Lake | Lv 105~115: A | Balder | In the end, everything dies, even the millenial dragons meet their end in the face of time. | 5000 years in the future | Players who die cannot be resurrected. | Bone Detardeurus |
| Ancient Temple | Lv 105~115: A | Vidar | The ocean is big. The dangers who dwell deep inside are also always unknown. | 1000 Years in the past | Powerful tides may wash players away to random places if they don't grip the floor (sit) when warned. | Kraken |
| Old Glast Heim | Lv 110~120: A | Vidar | The proud castle of Glast Heim is fighting a strange curse that corrupts its warriors. | 100 Years in the past | Black portals warp anyone who steps on them back to the entrance hall. A portal is required to reach the MVP. | Amdarais |
| Abyss Glast Heim | Lv 115~125: A | Thor | The darkness of the realm of the dead has completely frozen the entire castle to the point it snows from the ceilings. | 100 Years in the future | Every monster is immune to knockback and have massive movement speed. | Himmelmez |
| Prontera | Lv 115~120: B | Vidar | The corrupted forces of Glast Heim attack prontera and attempt to overwhelm its defenses. | 99 Years in the past | Guards can help players fight monsters or hold aggro momentarily. | Bijou and Knight Sakray |
| Horror Toy Factory | Lv 120~125: B | Vali | The smile ends when the toymaker finally dies. | 25 Years in the future | Toys stand completely still until someone comes close or tries to attack them. | Celine Kimi |
| Odin Temple | Lv 120~125: A | Vidar | The Valkyries are the warriors of Odin who guard his image and holy grounds. | 2000 Years in the past | Valkyries come to take the soul of dead players to Valhalla, disabling the Shadow System and it's ressurrections. | Valkyrie Reginleif |
| Ancient Verus Laboratory | Lv 125~130: B | Vidar | The mighty civilization of Verus may have made a terrible mistake that brought it down. | 500 Years in the past | Healing is constantly nulified and actions interrupted. | Charleston |
| Divine Temple of Freya | Lv 140~145: S | Balder | The cult of Rachel has gone out of control and managed to bring Freya back. | 10 Years in the future | Keys are required to access later areas, monsters are extremely aggressive. | Goddess Freya |
| Dimensional Gorge | Lv 145~150: S | Balder | Satan Morroc is back, now at full power. We have failed. | 5 Years in the future | All Current EXP for the level is lost on death. | Emperor Morroc |
| Thanatos Paradise | Lv 145~150: S | Balder | Thanatos has never been corrupted and has been elevated to the status of godhood, until now. | Lost Timeline | 4 emblems are needed to access the upper sanctuary of Thanatos. | Broken Thanatos |
| Abandoned Castle | Lv 145~150: S | Balder | The War of Emperium is no more. An incredible guild with no code of honor has permanently taken over the kingdom and fused their souls into an abominable Emperium. | 50 Years in the future | WoE mechanics and enemies use war tactics to fight. | Ymir Emperium |
| Jormungand's Lair | Lv 150: S | Balder | the original game has come. | [Redacted] | After being cleared by a party from the guild Bossfight Cafe, no longer requires Base Level payment to enter. | Jormungandr |
| Rachel Nightmare | Lv 130: SS | Balder | A Father never forgets its child. After Freya is slain by humans, Njord, her father, walks the land and plunges the city in a Nightmare. | 11 Years in the future | Can't see enemies HP bar. | Desperate Njord |
130, 150, and what comes after
One hundred and thirty is the soft cap and nothing in the game asks for more. One hundred and fifty is a challenge rather than a goal.


Achievements, as the original server documented it
This is the original server's own wiki, kept because it is the only surviving description of that world. The Refuge has changed a great deal of it. Where this site knows about a change it is stated above, or corrected in the text below; anything else here describes the game as it was, not as it is.
Return to Morroc features custom Achievements and Achievement Rewards!
Remember to check the tab Achievement Challenges tab , some achievements can help you in the early game by giving freebies!
- Many Achievements are granted automatically on completion, some are achieved by talking to NPCs and More!
- There are Achievements which can help you figure out where to progress next!
- Some achievements have been grouped together based on how they are earned. Their original category has also been listed in parentheses.
Character Achievements
This are all the Character related Achievements
| Achiev. Name | Description | Requirement | Reward | Points |
|---|---|---|---|---|
| Awakened Orphan | Having awakened from a strange, 5 year long slumber, you have learned how to live in New-Midgard. Hopefully. | Achieved Base Level 10 | First Rune Coffer | 10 |
| A Path Ahead... | Can change jobs and finally create a destiny for yourself... You can even get a reward from someone familiar. | Achieved Job Level 10 | Weapon Voucher | 10 |
| Wandering Orphan | The world is a cruel mistress, but those who persevere will evolve and grow along with it. And prosper. | Achieved Base level 50 | My First Card Album | 10 |
| Expert Orphan | Where the heroes once reached their limits and asked the Valkyries for a new way, an Orphan can continue forging ahead. | Achieved Base level 99 | Yggdrasil Berry | 10 |
| Master Orphan | A fearless person shall face all its challenges head on, never looking back, no regrets, no pain, only hope and dreams. | Achieved Base level 130 | 2nd Shadow Coffer | 10 |
| One More Step... | For those who went beyond their limits and never stopped, taking one more step can be the hardest moment, but the greatest. | Achieved Base level 149 | 4th Shadow Coffer | 10 |
| Conqueror of the Mark (Great Feat) | May the greatest of heroes rise above the world and spread wings. | Achieved Base level 150 | Costume Rudra Wings (Account Bound: Garment) | 10 |
| The Einherjar (Great Feat) | Only the best deserve the living wings. | AAchieved Base Level 150 without dying once | Costume Bloody Wings (Account Bound: Garment) | 30 |
| Achiev. Name | Description | Requirement | Reward | Points |
|---|---|---|---|---|
| Thor's Strength | Power to crush your enemies. The mightiest hammer. | Achieved 99 base STR | None | 10 |
| Loki's Agility | Agility to avoid danger. The quickest blade. | Achieved 99 base AGI | None | 10 |
| Idun's Vitality | Vitality to endure the injustice. The resilient body. | Achieved 99 base VIT | None | 10 |
| Mimir's Intelligence | Knowledge to outwit your enemies. The smartest mind. | Achieved 99 base INT | None | 10 |
| Bragi's Dexterity | Dexterity to focus the target. The perfect song. | Achieved 99 base DEX | None | 10 |
| Balder's Luck | Luck for when all else fails. The hand of destiny. | Achieved 99 base LUK | None | 10 |
| Achiev. Name | Description | Requirement | Reward | Points |
|---|---|---|---|---|
| The Hoarder | Everything has a value, and value can be money. Everything can be made into money. | Increase Max Weight Limit to 5000 | None | 10 |
| The Hippie | Having stuff is useless and a waste in this beautiful world. You should move to the beach and sell art. | Having 0 carried weight and money | None | 10 |
| The Achievement | You got this one for free, can't complain! | Talk to the Collector and ask for Achievements | None | 10 |
| Impossible | There's no way that can be right! | Raise HP over 9.000 | None | 10 |
| The Glass | I can't be killed if enemies die first | Reduce Max HP to 1 | None | 10 |
| The Brute | Me strong. Me smash hard. | Reduce Max SP to 1 | None | 10 |
| Welcome To Morroc | It happens to everyone, don't take it too seriously. | Died once in the game | Initiate Potion | 10 |
| No Hiding Allowed | I swear, I dodged that, this is bullshit. | Died over 100 times. | Yggdrasil Berry | 10 |
World Achievements
This are all the World related Achievements
| Achiev. Name | Description | Requirement | Reward | Points |
|---|---|---|---|---|
| Member of the Orphanage | It's appreciated when a person helps out of the good of their heart. | Donated 10.000z to the Orphanage at once | None | 10 |
| Supporter of the Orphanage | Thats very nice of you. I'm sure everyone is grateful. | Donated 50.000z to the Orphanage at once | None | 10 |
| Patron of the Orphanage | Wow! Are you even an Orphan??? | Donated 100.000z to the Orphanage at once | None | 10 |
| Bonfire Lit | Not really a firekeeper, but clearly a nice lady regardless. | Ask Kafra Allysia for a Kafra Elixir refill | None | 10 |
| Remember Me? | Once a person who helps newcomers, always a person who helps newcomers. | Talk to Sprakki on the Orphanage Reception | None | 10 |
| Achiev. Name | Description | Requirement | Reward | Points |
|---|---|---|---|---|
| Gate to Paradiso | For those looking for a charm of protection and blessings. | Create the Paradiso Tome | None | 10 |
| Gate to Purgatorio | For those looking for a charm of speed and utility. | Create the Purgatorio Tome | None | 10 |
| Gate to Inferno | For those looking for a charm of power and offensive. | Create the Inferno Tome | None | 10 |
| Divine Trinity (Great Feat) | For those who break all limits of humanity and delve into divinity. | Create the Celestial Tome | Costume White Angel Wings (Account Bound: Garment) | 10 |
| Blooming Roses | The most beautiful shoes to exist in the fanciest place in this land. | Repair the Old Blooming Sandals | None | 10 |
| Achiev. Name | Description | Requirement | Reward | Points |
|---|---|---|---|---|
| Greatest. Smith. Ever. | Get used to it. At least he doesn't break your stuff. | Fail a refinement for the first time | None | 10 |
| Master Weaponsmith Lv1 | That wasn't so hard was it? | Successfully refine a level 1 weapon to 10 | None | 10 |
| Master Weaponsmith Lv2 | This must have been expensive | Successfully refine a level 2 weapon to 10 | None | 10 |
| Master Weaponsmith Lv3 | Now now, we don't like to show-off a lot, but this is pretty impressive! | Successfully refine a level 3 weapon to 10 | None | 10 |
| Master Weaponsmith Lv4 (Great Feat) | Unbelievable. | Successfully refine a level 4 weapon to 10 | Costume Brilliant Wings (Account Bound: Garment) | 10 |
| Achiev. Name | Description | Requirement | Reward | Points |
|---|---|---|---|---|
| Mr Kim a Rich Man Lv1 | You can hear a distant duo playing this for you. | Carry 100.000z in your Inventory | None | 10 |
| Mr Kim a Rich Man Lv2 | You can hear a duo playing this for you nearby. | Carry 1.000.000z in your Inventory | None | 10 |
| Mr Kim a Rich Man Lv3 | You basically carry a duo playing this for you around, dont you? | Carry 10.000.000z in your Inventory | None | 10 |
| I think I need it! | Welcome to Alberta! You can buy cool stuff here! | Spend 10.000z in a Merchant Vend | None | 10 |
| I really I need it! | Welcome to Alberta! Be careful to not go broke! | Spend 100.000z in a Merchant Vend | None | 10 |
| I MUST I need it! | Welcome to Alberta! Please don't become a beggar! | Spend 1.000.000z in a Merchant Vend | None | 10 |
| Achiev. Name | Description | Requirement | Reward | Points |
|---|---|---|---|---|
| Better with Friends~~ | Parties are essential to fight as a group. Friends make any trip easier. | Create a party | None | 10 |
| AFK | Everyone knows you wrote this on the chatroom title. | Create a chatroom | None | 10 |
| Ress PLS | No priests around this time. | Create a chatroom when dead | None | 10 |
| Reasonable Expectations | Ornstein expected this many people in Discord when he started. Crazy huh? | Fill a chatroom with 20 people | None | 10 |
| Achiev. Name | Description | Requirement | Reward | Points |
|---|---|---|---|---|
| Welcome to Prontera | Everyone comes through this place sometime. | Talk to the Prontera Kafra for the first time | None | 10 |
| Welcome to Yuno | Do you know how this city floats? It's a really interesting story... | Talk to the Yuno Kafra for the first time | None | 10 |
| Welcome to Rachel | Now go away. | Talk to the Rachel Kafra for the first time | None | 10 |
| Welcome to Niflheim | Everyone eventually meets this kafra anyway. | Talk to the Niflheim Kafra for the first time | None | 10 |
| Welcome to Dicastes Diel | A fortress of ice and knowledge, a place of research. | Talk to the Sage Receptionist for the first time | None | 10 |
| Welcome to Nomad Village | A home for everyone looking for a new life. | Talk to the Nomad Village Kafra for the first time | None | 10 |
| Welcome to Mora | Aren't these plants cute? Watch your wallet. | Talk to the Mora Kafra for the first time | None | 10 |
Battle Achievements
This are all the Battle related Achievements
| Achiev. Name | Description | Requirement | Reward | Points |
|---|---|---|---|---|
| Jellocide | These monsters may seem harmless, but they can swarm you and eat all your items. And mess up your hair. | Hunt the terrible beasts of evil : 250 Poring 250 Drops 250 Poporing 250 Marin 50 Mastering | Costume Poring Aura (Garment) | 10 |
| Rain season | You swear it's gonna rain soon. So you need to purify those umbrella demons | Wipe the Karakasa population : 1000 Karakasa | Costume Umbrella Hat (Upper) | 10 |
| Plant Farming | Jesters get extra joy from this activity. | It's Harvest time : 200 Red Plants 200 Blue Plants 200 Green Plants 200 Yellow Plants 200 White Plants | Costume Blowing Scattered Sakura (Lower) | 10 |
| Chocolate Run | It will not drop any chocolate, but that won't stop you, will it? | Consume every Chocolate Bear : 1000 Chocolate Bear | Costume Teddy Bear Hood (Upper) | 10 |
| Waste of Time | It won't even give you a cool reward! | Exterminate the useless coward : 100 Coward Q | Costume Invisible Manteau (Garment) | 10 |
| First Boss | Piamette is an evil being. A strange girl that once was taken to the Orphanage, until she started murdering her friends... | Defeat Orphan Piamette : 1 Orphan Piamette | Lost Orphan Coffer | 20 |
| Achiev. Name | Description | Requirement | Reward | Points |
|---|---|---|---|---|
| Rank E Hunter | Show that you can handle simple fighting! | Defeat the Bosses and dominate the Rank E Dungeons : 1 Golden Thief Bug 1 Noble Devourer 1 Stormy Knight 1 Vesper | None | 10 |
| Rank D Hunter | Show that you can handle decent fighting! | Defeat the Bosses and dominate the Rank D Dungeons : 1 Osiris 1 Dracula 1 Coelacanth 1 RSX-0806 | None | 10 |
| Rank C Hunter | Show that you can handle good fighting! | Defeat the Bosses and dominate the Rank C Dungeons : 1 Orc Lord 1 Nydhogg 1 Brinaranea 1 Gloom Under Night | None | 10 |
| Rank B Hunter | Show that you can handle complex fighting! | Defeat the Bosses and dominate the Rank V Dungeons : 1 Pharaoh 1 Incarnation Samurai 1 Kafra Manager Jenni 1 Paradox Amdarais | None | 10 |
| Rank A Hunter | Show that you can handle difficult fighting! | Defeat the Bosses and dominate the Rank A Dungeons : 1 Angry Pyuriel 1 Faceworm Queen 1 Kafra Manager Jenni 1 Paradox Amdarais | None | 10 |
| Rank S Hunter | Show that you can handle legendary fighting! | Defeat the Bosses and dominate the Rank S Dungeons : 1 Serpens 1 Baroness of Despair 1 Master Loki 1 Absolute Seyren | None | 10 |
| Legendary Hunter (Great Feat) | The Ultimate Warrior can defeat any enemy! | Defeat the Bosses and become the greatest in New-Midgard! : 1 Goddess Freya 1 King Schmidt 1 Emperor Morroc 1 Jormungandr | Costume Fallen Angel Wings (Account Bound: Garment) | 10 |
Lore Achievements
This are all the Lore related Achievements
| Achiev. Name | Description | Requirement | Reward | Points |
|---|---|---|---|---|
| 1st Chapter | Help the good old lady. | Complete the Lv10 Main Story Quest. | None | 10 |
| 2nd Chapter | Go to the castle. | Complete the Lv20 Main Story Quest. | None | 10 |
| 3rd Chapter | Look for your friend. | Complete the Lv30 Main Story Quest. | None | 10 |
| 4th Chapter | Understand this situation. | Complete the Lv40 Main Story Quest. | None | 10 |
| 5th Chapter | Invade the location successfully. | Complete the Lv50 Main Story Quest. | None | 10 |
| 6th Chapter | Meet the man in Hugel. | Complete the Lv60 Main Story Quest. | None | 10 |
| 7th Chapter | Protect your home. | Complete the Lv70 Main Story Quest. | None | 10 |
| 8th Chapter | Find a way to turn your luck around. | Complete the Lv80 Main Story Quest. | None | 10 |
| 9th Chapter | Escape the difficult situation | Complete the Lv90 Main Story Quest. | None | 10 |
| 10th Chapter | Face your fears. | Complete the Lv100 Main Story Quest. | None | 10 |
| 11th Chapter | Make the hardest decision in your life. | Complete the Lv110 Main Story Quest. | None | 10 |
| 12th Chapter | Fulfill your destiny. | Complete the Lv120 Main Story Quest. | None | 10 |
| Achiev. Name | Description | Requirement | Reward | Points |
|---|---|---|---|---|
| Lost Ring | She went through so much already and she takes care of you. Take care of her. | Find Kafra Allysia's lost ring | None | 10 |
| 3 Sages | The scrolls of the sages can show new secrets around the world. Eventually... | Find the Record Keeper. | None | 10 |
| Pay Respects | Pay your respects for the victims of the Veins Incident | Press F. | None | 10 |
| Chaos | Is this really the hero that will save everyone? | Meet Chaos, the hero from Payon, for the first time | None | 10 |
| Sarah's Costume Shop | She can help her friends now! | Find Sarah's Costume Shop | None | 10 |
Quests Achievements
This are all the Quests related Achievements
| Achiev. Name | Description | Requirement | Reward | Points |
|---|---|---|---|---|
| Hello Dude | The HATred Dude can be found in 90 locations around the world. Can you get all his hats? | Finish the Pyramid Basement HATred Quest | None | 10 |
| 10 HATred Quests | Nobody knows who the HATred dude is, or what he wants. Can you figure it out? | Finish 10 HATred Quests | None | 10 |
| 45 HATred Quests | For how angry the HATred dude is, he actually is very helpful, in his own way. | Finish 45 HATred Quests | None | 10 |
| All HATred Quests | You finally have finished all his requests. Is he calm now? | Finish All HATred Quests | None | 10 |
| Achiev. Name | Description | Requirement | Reward | Points |
|---|---|---|---|---|
| Mirror Shard | The Shard can be found near where Morroc opened the Dimensional Gorge and was defeated in battle by the guild coallition. | Find the Bifrost Mirror Shard | None | 10 |
| Eye of Vidar | Each eye from the sons of Odin can be found in one of the corners of the world. | Find the Eye of Vidar | None | 10 |
| Eye of Vali | The 4 corners of New-Midgard are: Rune-Midgard, Arunafeltz, Schwarzwald and Niflheim. | Find the Eye of Vali | None | 10 |
| Eye of Thor | The Eyes can be used with the Bifrost Mirror Shard to access Temporal Distortions. | Find the Eye of Thor | None | 10 |
| Eye of Balder | Temporal Distortions can show you the past, the present or an entirely new reality. | Find the Eye of Balder | None | 10 |
| Complete Mirror | An Orphan with a complete mirror can travel through every reality without restrictions. | Complete the Bifrost Mirror Shard | None | 10 |
| Achiev. Name | Description | Requirement | Reward | Points |
|---|---|---|---|---|
| Meet the Nanny | The Nanny cares about all orphans, she will provide a helping hand to help with the rough start. | Speak with the Nanny in the Orphanage | None | 10 |
| Meet the Caravan | The Caravan can take orphans to Prontera Fields or Payon Forest, both places are welcoming as first steps. | Use the Caravan in the Orphanage to visit other places | None | 10 |
| Meet the Cartographer | The Cartographer can usually be found near the caravan, and will explain how maps work to anyone willing to listen. | Talk to the map Cartographer near the Oasis in Sograt Desert | None | 10 |
| Try Again | The Fountain can help you correct mistakes and rework your path. For a price. Mistakes can be fixed with fair work. | Check the fountain in the Orphanage | None | 10 |
| Return the Mirror | The Mirror can reset stats. But this will break the mirror and make the Nanny sad... | Return the Mirror to the Nanny after you reach Base Level 15. | None | 10 |
Ranking System, as the original server documented it
This is the original server's own wiki, kept because it is the only surviving description of that world. The Refuge has changed a great deal of it. Where this site knows about a change it is stated above, or corrected in the text below; anything else here describes the game as it was, not as it is.
Tailor-made Challenges
Return to Morroc dungeons are always split in two types: Dungeons and Distortion Dungeons
regardless of the type of dungeon a player visits, they will always have their rank, which denotes its difficulty and what Shadow spawns when a player dies there.
Visit Combat Reworked for details on how the combat works and it's dynamics.
- Every dungeon can be handled solo by a sufficiently prepared player, including it's MVP. There are no cheap one shots.
- The recommendations are for reasonable leveling without major struggles. Ignoring some mechanics can still result in death over multiple mistakes.
- Being overleveled may help mitigate some difficulty from the dungeons, at the cost of EXP.
Ranks
The Ranks that shows the difficulty levels can be found on the World Map (Default shortcut: CTRL + ' ) and map banners when a map is entered.
In most cases, a higher rank dungeon will have better drops and provide more exp, as long as a player/party can handle it's difficulty. Lower rank dungeons may sometimes present mechanics from higher rank dungeons under specific circunstances.
- Distortion Dungeons are only available in Ranks B , A or S .
RANK E
Rank E dungeons are very easy overall. They are meant for players that don't want to stress over long fights and want an easier time. This doesn't mean they are boring or don't have mechanics, they can still hurt those unprepared.
Recommendations
Party : Any party with any level of preparation.
Solo : Any player with any level of preparation.
- Rank E dungeons usually are recommended for players who are not used to the combat mechanics of Return to Morroc.
- Rank E dungeon have difficulty similar or slightly below fields.
- Rank E mechanics usually are easy to predict, avoidable, require no specific gears and rarely have potential to one shot on major mistakes.
RANK D
Rank D dungeons require attention and managing resources to farm effectively. They can still be handled with basic gear, but mistakes are more punishing and luring too many monsters can prove fatal.
Recommendations
Party : Any party with any level of preparation. A party of 2+ is recommended for ungeared parties.
Solo : Any player with basic level of preparation. Access to Heal Lv5 is greatly recommended.
- Rank D dungeons usually are recommended for players who understand basic mechanics of Return to Morroc.
- Rank D dungeon have difficulty slightly above fields.
- Rank D mechanics usually are reasonable to predict, avoidable, require no specific gears and have very minor potential to one shot. Monsters may have minor combo sequences.
RANK C
Rank C dungeons can hurt unprepared players. They usually require basic cards or reactions based on enemy behavior. They can still be handled when undergeared but they may provide a challenge and mistakes can be crippling.
Recommendations
Party : Any party with basic level of preparation. A party of 3+ is recommended for ungeared parties.
Solo : Any player with cards and reasonable level of preparation. Access to Heal Lv5 is greatly recommended.
- Rank C dungeons usually are recommended for players who know the skill mechanics of Return to Morroc.
- Rank C dungeon monsters may have multiple patterns/mechanics.
- Rank C mechanics usually are predictable, avoidable, require no specific gears and have minor potential to one shot. Monsters may have minor combo sequences and reactive skills under specific cases.
RANK B
Rank B dungeons are always a challenge when a player is on the same level range. They require reasonable cards and knowing the job potential and limits. Monsters usually require multiple rotations to be killed and can force the player to fight under their rules in specific cases.
Recommendations
Party : Any party with cards and good level of preparation. A party of 5+ is recommended for undergeared parties. Not recommended for ungeared parties.
Solo : Any player with good cards and decent level of preparation. Access to Heal Lv10 is greatly recommended.
- Rank B dungeons usually are recommended for players who are very comfortable with the combat of Return to Morroc.
- Rank B dungeon monsters have varied engaging ways, may disrupt player actions and apply status effects.
- Rank B mechanics are predictable and avoidable, but require precision. They require moderate gear and have some potential for one shots when damage is ignored. Monsters may have combo sequences, reactive skills and disruptions such as status effects and movement impairment.
RANK A
Rank A dungeons are harder dungeons that have small margin for error. They punish players for any mistakes and in some cases can be fatal. Cards and refined gear are regular needs, along with status resistances. A player who is not prepared may fight for some time, but death is sure to come eventually.
Recommendations
Party : Prepared party with cards and decent equipment. A party of 4+ is recommended for mid-geared parties. Not recommended for undergeared parties.
Solo : Any player with good cards and decent level of preparation. Access to Heal Lv10 is greatly recommended.
- Rank A dungeons are recommended only for players who are very comfortable and understand the combat of Return to Morroc.
- Rank A dungeon monsters have multiple mechanics, minor phase changes and react in unpredictable ways.
- Rank A mechanics are both avoidable and precise. Monsters may include unavoidable mechanics to act as checks for resistances, prediction and defenses under specific cases. Monsters may have specific status immunities or knockback resistances.
RANK S
Rank S dungeons are among the hardest challenges in Return to Morroc. They can take down even prepared parties with a barrage of skills, status, monsters and phases. They are always punishing and failing a very clear, very obvious long mechanic pretty much guarantees death.
Recommendations
Party : Prepared party with good cards and good equipment. A party of 6 is recommended for mid-geared parties. Not recommended for low-geared parties.
Solo : A very well prepared and experient player. Access to Heal Lv10 is required for any chance of success.
- Rank S dungeons are recommended only for players who mastered the combat of Return to Morroc.
- Rank S dungeon monsters have multiple mechanics, aggression and can be unpredictable. They can use skills under new rules, have specific counters to specific combat methods or require strong mitigation or some equip swapping.
- Rank S mechanics can be split in multiple parts, ensuring a player needs to pay attention to what a monster already did to know what to expect. Monsters may change behavior and require careful positioning during the fight so as not to kill a party member as colateral damage while handling a skill.
- Mistakes can be punished with one shots or even party wipes.
Material on this page is transcribed from the original server's own wiki, recovered from the Internet Archive, and from our own posts. Where the two disagree, the posts win and the difference is called out in a purple box. A few pages were never archived and are marked where they appear. Numbers may still move before launch.